This is how to Whirlpool Hops with or without a pump. Whirlpooling your beer is a process that allows you to add hops flavor and aroma to almost any beer.
It’s an easy process for the home brewer, but it does require some special equipment. If you don’t have a whirlpool vessel, you can simply use another brew kettle with a false bottom that fits above the primary kettle.
So why would you want to whirlpool your beer? Whirlpooling is used primarily on beers that are heavy on the hop flavor and aroma. It is not recommended for lighter lager or ale styles because they don’t really benefit from the process of whirlpooling.
Whirlpooling results in a lager or pilsner with a much stronger hop flavor and aroma. If you are ready to whirlpool your beer at home, follow these whirlpool hopping strategies from experts steps:
What is Whirlpooling?
Whirlpooling is a process that takes place after the wort has been boiled and before it is cooled- separates debris (hop pellets and trub in most instances) from your wort after the boil. The boil causes proteins to coagulate and form a “hot break” on the top of the wort, which can then be skimmed off.
However, some brewing sites note that there is still protein left in the liquid and that it needs to be removed. This is where whirlpooling comes into play. In short, whirlpooling is when hot liquid spins around in a vortex-like motion and gathers at one point.
It does this because of differential densities between different types of matter. As different densities collide with each other, they will sink or rise.
At the center of this vortex, you will find the densest particles: water molecules are denser than hops flowers, or any other natural materials from the brewing process.
With all these particles swirling together at one point, the only way for them to escape is up through an open valve or out of an open tap above the whirlpooler.
In this sense, you can think of whirlpooling as a kind of filtering mechanism or purification process that happens naturally as long as you have enough force behind it (usually gravity).
Related: How to Make Lager: A Comprehensive Guide to Fermenting Your Own Beer in 5 Steps
Why Whirlpool Hops?
The whirlpool process ensures that you get the hop aroma oils out and thus giving your beer a more pronounced flavor and aroma, which is ideal for IPAs and other hop-forward beers.
This is because hops produce most of their flavor and aroma when they are boiled. But if you are doing a 90-minute boil, much of the hop oils will evaporate.
The longer you boil, the more the oils will be reduced. That is why many brewers choose to do a whirlpool (or “hop stand”), which boils for less time but still extracts hop oils.
Related: How to whirlpool your beer after the boil
How to Whirlpool hops with a pump
If you have a pump, you can whirlpool your wort using the following steps:
- The first step is you need to boil the wort in the vessel- the vessel depends on the amount of wort you have. Once it boils, you need to start cooling it off.
- Once the wort starts cooling, you can start adding hops once a whirlpool forms. This ensures that the process does not produce a bitter hops taste but also breaks down the edible oils from the hops.
- Once the process is complete, pump the wort to the whirlpool vessel fast (15 feet per second or more). The process will give you a whirlpool wort that has the hops or pellets.
- Thereafter, let the pumped wort stand for approximately 20 minutes. This will let the wort cool down and also ensure the soluble oils are properly settled in the wort.
- Finally, release the wort solution containing the soluble hops oils through an outlet and into a can.
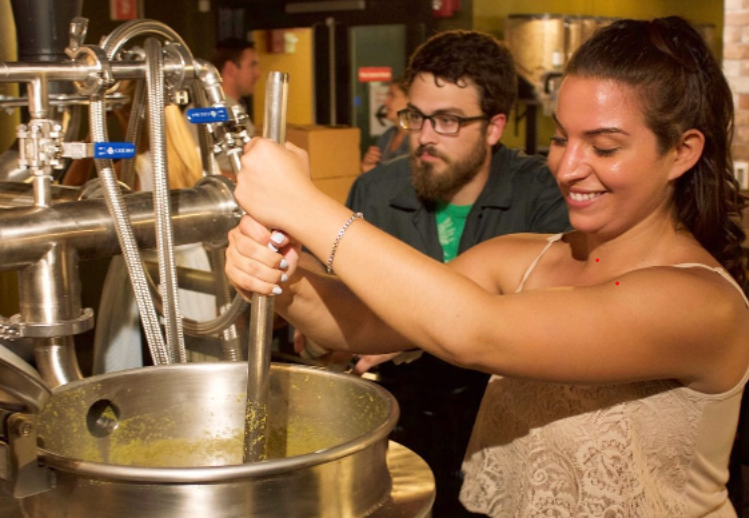
How to Whirlpool hops without a pump
The steps for this whirlpool process are the same except that you will need to remove the hops in a different way and also you will be required to stir the wort to create a whirlpool. Therefore, to whirlpool hops with a pump, you can follow the following steps:
- Like when having a pump, you need to boil the wort in the vessel– the vessel size is dependent on the amount of wort that you have. Once the wort comes to a boil, you need to start cooling it off.
- Then, stir the wort and hop mixture vigorously in a circular motion thus creating a mini-whirlpool. For this, you need a wooded stirring spoon or a big stainless steel spoon but with a handle that does not transmit heat.
- Then add the whirlpool hops to the wort while it is still moving in the circular motion. This will ensure the edible and soluble oils from the hops are separated from the hops.
- Thereafter, leave the wort-hops mixture for about 10 to 20 minutes. The process will ensure the wort is cooled off and also the oils and flavor become part of the wort.
- Finally, use a heat-resistant container to remove the hops.
How to Whirlpool hops with a pump for commercial brewers
The process of whirlpooling hops in a commercial brewer is almost the same as the process described above but with the use of a whirlpool vessel. Therefore, you can follow the following steps:
- Boil the wort in the vessel
- Add the whirlpool hops once a whirlpool forms when it starts cooling,
- Pump the wort to the whirlpool vessel fast (15 feet per second),
- Release the wort through a tap leaving the hops in the whirlpool vessel.
How to Whirlpool Using a Hop Back
Whirlpooling is a process that uses hot water to separate the protein and hop particles from the wort. When whirlpooling is done correctly, the hot break proteins that are often responsible for chill haze are removed, as well as any hop particles that make it into the fermenter.
That’s not all though! The addition of these hops also gives your beer an extra burst of aroma and flavor without adding any bitterness.
To start, you will need a vessel for whirlpooling. This is not the same as your fermentation vessel, which is typically cylindrical and tall.
The best option is to use a hop back, which can be purchased from many homebrew supply shops or online retailers. Hop-back vessels look like rectangular columns and are designed for storing hops during the boiling process.
They are much taller than typical fermentation vessels to allow for the buildup of foam during the whirlpooling process. Some even have ports at the bottom to help release any built-up pressure that may occur during boiling.
For those without access to a hop back, your next best option would be a sanitized stock pot or another barrel that has been emptied of its contents. You will want to make sure this is large enough to store all of your wort while still leaving room for foam-causing additions such as hops.
To properly set up your whirlpool, you will need to add one pound of hops per 5 gallons of wort after you have boiled it and removed it from heat (typically 15 minutes).
As the steam dissipates and rises in the vessel, these hops will create a vortex effect on top, collecting in one spot so that all of your aromas and flavors can be pulled into one concentrated location.
How to Whirlpool Using a Coiling Condenser and Lock-out Stance
A coiling condenser and lock-out stance are the two most important pieces of hardware in your whirlpooling toolkit. While a coiling condenser is essential for whirlpooling, you can use a simple pot and a pot rack to achieve a similar effect.
A lock-out stance is perfect for when you want to maintain control over the temperature of your wort as it enters the whirlpool, but many homebrewers choose to skip this step.
If you want to whirlpool your hops, the first thing you will need is an immersion chiller. The goal of this process is to cool down your wort before it enters the fermentation vessel in order to reduce the risk of contamination.
When using an immersion chiller for this purpose, you should fill it with ice water and make sure it drains well before adding the hot wort. Next, make sure that your kettle has sufficient depth.
You will be placing the immersion chiller from your brewing setup in the kettle during this process. To begin coiling, place your immersion chiller in hot wort with the coil turned off and cold water flowing through it until you reach your desired whirlpool depth.
Make sure that you have a lock-out stance on top of a chair so that there is no chance of standing directly over or under the hot liquid. Slowly turn on the coil while rotating the kettle every few minutes to create as much turbulence as possible.
Once coils are fully turned on, keep them running for at least five minutes before turning them off or taking off the lock-out stance and allowing the coiling condenser to drain completely into the brew pot or whirlpooling device reservoir.
Tips for Whirlpooling at Home
One of the most critical steps in whirlpooling hops is not to cover your pot since it will retain the dimethyl sulfide (DMS). Covering a pot while boiling can also lead to an increase in dimethyl sulfide (DMS), which can cause a beer’s taste to have a ‘different’ or ‘bready’ flavor and an off taste. Moreover, it can kill the yeast if highly concentrated.
However, some brewers also indicate that if you do not cover the pot, then all of the hop oils that are added to your brew will evaporate as they boil. This tip for whirlpooling at home is to ensure that you cover the pot when boiling after adding hops- any oil from the hops will evaporate into the air if covered and this will affect both flavor and aroma significantly!
This will leave your beer tasting bland and lacking any aroma. Therefore, you need to make a personal decision about if you will cover the port or not.
Additionally, when you begin to boil after adding hops at the beginning of your brew process, it may result in ‘harsh’ flavors due to the increased concentration of sulfur and other volatile compounds.
The process of whirlpooling is not as straightforward as it may seem. There are a variety of things you will need to keep in mind when you are preparing for your next brew. Here are some tips for whirlpooling at home:
- Do not cover the pot- will retain dimethyl sulfide (DMS), or you can cover the pot to ensure hop oils do not evaporate.
- Increase the boil time.
- Do not use a lid on the pot- this helps create turbulence and aids in breaking down resin, essential oils, and alpha acids.
- Stir continuously- this helps reduce DMS levels and aids in breaking down of alpha acids, resins, and essential oils.
- Ensure that when transferring beer from the kettle to the fermenter, you switch sides. This ensures no hop material enters the vessel with your wort which can affect head retention or flavor profile.
- Consider adding dry hops during fermentation rather than after packaging- dry hopping is free of any oxidizing agents so your beer will maintain freshness while still gaining all those great flavors that dry hopping provides!
When To Add Whirlpool Hops in Wort?
The hop oils in the hops are mostly volatile, so add the whirlpool hops when the whirlpool starts in the vessel at 180 °F or lower temperature depending on the range you are using. This is as follows:
High whirlpool range
The high whirlpool range (high isomerization range) is between 185 and 210 °F (85-99 °C). The most common temperature for a whirlpool is 190°F (88°C), which corresponds to the boiling point of water.
The higher the whirlpool range, the more bitter the beer will be. The high isomerization range has two main advantages.
- First, it helps reduce the risk of oxidizing alpha acids.
- Second, because the temperature is relatively high and close to the boiling point, it accelerates the production of flavor and aroma compounds. The temperature should be 185-210 °F (85-99 °C).
Medium whirlpool range
While the optimum range for isomerization of alpha acids is 140–150 °F (60–65 °C), a medium whirlpool will still extract some flavor and aroma from hops.
The first thing to keep in mind is that the temperature you need to whirlpool at depends on the alpha acid content of your hops, as well as your desired flavor and aroma.
For most home brewers, a medium whirlpool range is ideal — this means 160-170 degrees Fahrenheit (71-76 degrees Celsius).
If you are brewing a pale ale or IPA, for example, you will want to whirlpool for about five minutes at 160–170 degrees Fahrenheit.
If you are brewing a pilsner or some other hopless beer, you may want to whirlpool for three minutes at 160–170 degrees Fahrenheit.
A good rule of thumb is to use half the amount of pellets as cones when calculating how much time to spend in the whirlpool.
Low whirlpool range
The first thing to note about whirlpooling is that it requires a low whirlpool range. This means the temperature of the water must stay at around 150-160 degrees Fahrenheit (60-66 degrees Celsius).
If you don’t have a thermometer, there are two ways to tell if the water is in this range:
- You can simply dip your finger into the kettle and see if you can comfortably keep your finger in the water for 10 seconds.
- You can also use a spoon to stir around in the kettle, then take a drop of water on your finger and wait until it feels comfortable.
The temperature of the whirlpool is important in order to get the full effect. The low range for whirlpooling hops is 150-160 °F (60-66 °C). If you don’t have a thermometer, you can test whether it’s hot enough by putting your finger inside for about five seconds.
Summary
The whirlpool is a process used by homebrewers to create more hop flavor and aroma. The hops are added at the start of the boil, then the wort is brought to a boil, and the hops are added again.
After that, the mixture is allowed to cool down until it reaches your target temperature (usually between 170 and 180 degrees Fahrenheit).
At this point, you’ll want to remove as much of the hot break from the wort as possible. This will help you avoid introducing any harsh flavors or aromas from those compounds into your beer.
FAQs
Do you need to whirlpool beer?
You do not need to whirlpool beer while brewing your own beer but the process gives your beer the best aroma and taste if conducted properly. This is because the main reason for whirlpooling is to remove the hop and trub material before fermentation but retain the taste and flavor of the hops in the wort.
How long should I whirlpool for?
The process of whirlpooling your beer takes between 15 to 30 minutes. This ensures that the edible soluble hop oils are all released to the wort and the hoppy smell and flavor are achieved. Therefore, avoid very high temperatures or very low temperatures since they will spoil the taste and flavor of your beer.
Do Whirlpool hops add bitterness?
The whirlpooling process does not add bitterness to the beer but releases the volatile hop aroma oils into the wort for your beer production. However, to achieve this, you need to follow the laid down steps and check the temperatures for whirlpooling to ensure you do not come up with a bitter beer.
